
EDITOR TECHNICAL GUIDELINES:
* Make sure to check the bin EDITOR TOOLKIT for templates and examples and such.
* Audio - make sure Settings > User > Audio > is set to ALTERNATING L/R and not centered. Then make sure to manually center pan all microphones that are single input (which is nearly every lav, boom and table mic, with the exception of L/R stereo music feeds and some Audience mics recorded in stereo).
* Audio - (Optional, but I like it for music editing) - Settings > Project > Audio Project > Effects > Dissolve Midpoint Attenuation > Equal Power (a cross dissolve won’t then dip in levels during the middle of the dissolve.)
* Audio - field levels are recorded fairly low to protect against over-modulation, so try the proven Shanks method…. Show the volume levels on all audio tracks, Put keyframes on some media segments, then copy/paste those keyframes to the rest of the audio segments, then set in and out points at beginning and end of sequence, then yank a keyframe up to +12 db (all the rest will follow) and then hide the volume rubber bands and mix from there.
* Audio mix - peak as loud as it will go without hitting the red. (How’s that for tech specs?). This is so network execs don’t have to crank up their volume for our show and then get mad at us when they go to YouTube and it blasts their ears.
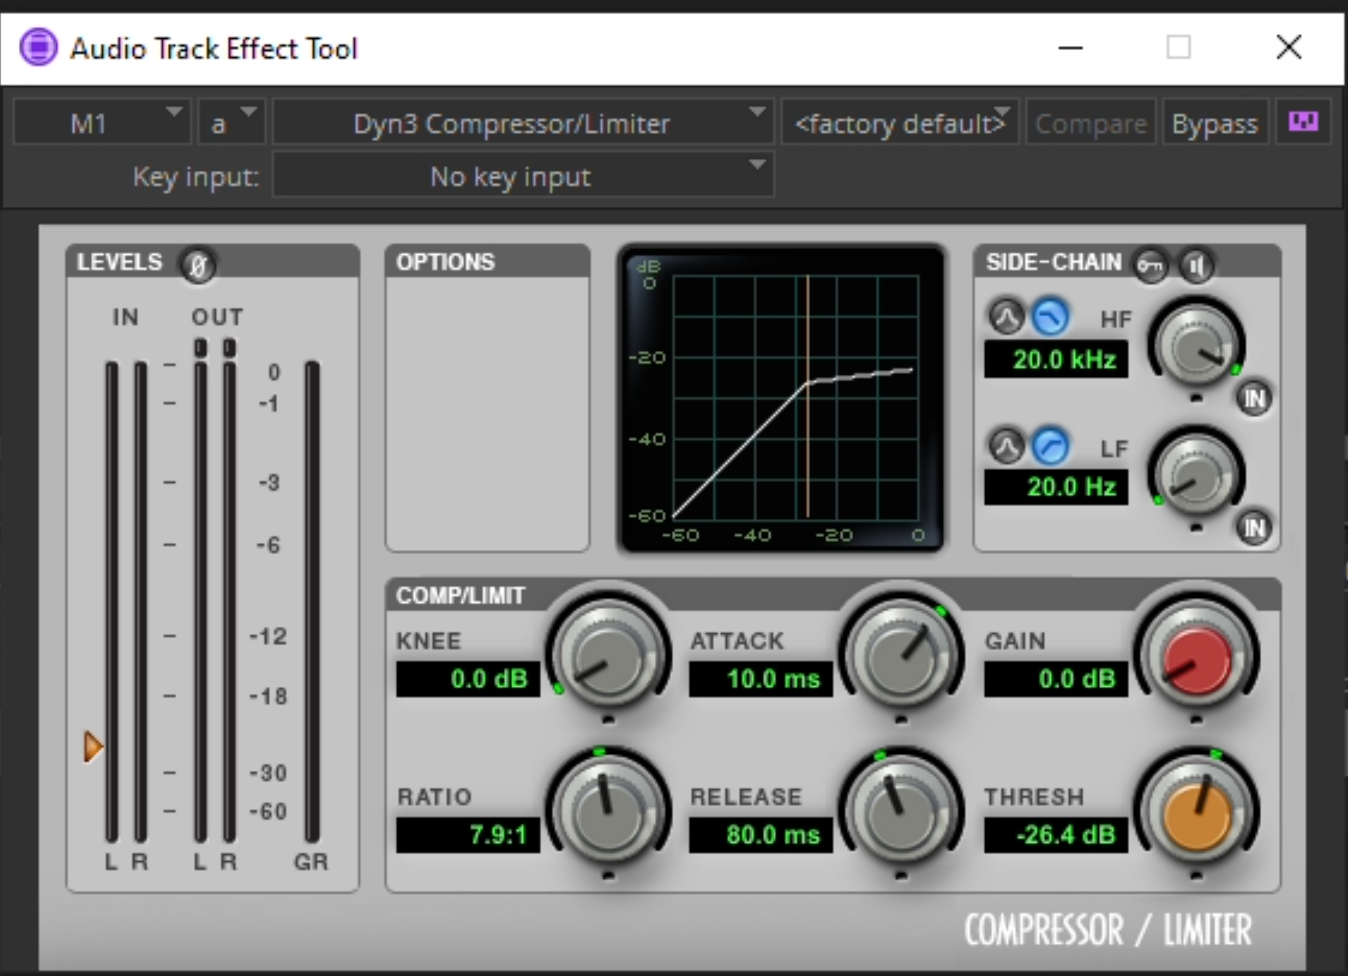
* Timeline: use the template in Editor Toolkit and keep dialogue, music & sound effects separate (tracks are labeled). **Note there are D-Verb tracks on 25 & 26. If you have to add more SFX or Music tracks, do it below the D-Verb, but keep the original order so we’re all working on the same sequence and our AEs will have an easy time of export. ALSO, there is a compressor/limiter on the MASTER FADER which makes it easier to mix--make sure to keep it on there, thanks!
* Scale limit = 110. If you have to zoom in more than 10%, we’ll need to send the shot to online so they can approve the scaling in—apparently Hulu’s QC department kicks back a lot of zoomed in video.
* For still photos use S_PanAndZoom and link to the full resolution still on zStills on EDITOR drive.
* We’re putting a 2.0 Mask across all video (in editor toolkit) to match the aspect ratio of our field cameras.
* While editing let’s mute rather than delete audio we’re not using (feel free to lose the mixes entirely though). I find we end up needing quick access to a lot of audio we never thought we’d need later in the editing process. And whoever is delivering the episode to the mix & online can (at the very last minute when everything is all locked) select all muted audio segments with 2 clicks and drag them to the far far right of the timeline and delete them. Takes 15 seconds. But having that audio along the way can be invaluable.
* Please make sure there’s always some room tone if no one is talking and there’s no music. Dead silence is verboten.
* Do NOT use Titler+. Use the 1990s technology called SubCap. Yes, I’m serious. It seems like Titler+ works, but as you move further through a project it starts to bog down the system in unmanageable ways. Blame AVID. It’s unconscionable that they can’t make a decent Title Tool in the year 2024, but somehow they’ve managed it… again.
* When using SubCap... Make sure to click the first box called "Edit Global Properties" and double check that the last tab labeled Synchronize has every choice set to CLIP. If not, your other SubCap titles will change styles automatically and it's a big mess.
* Rock it, you legend. Rock it.
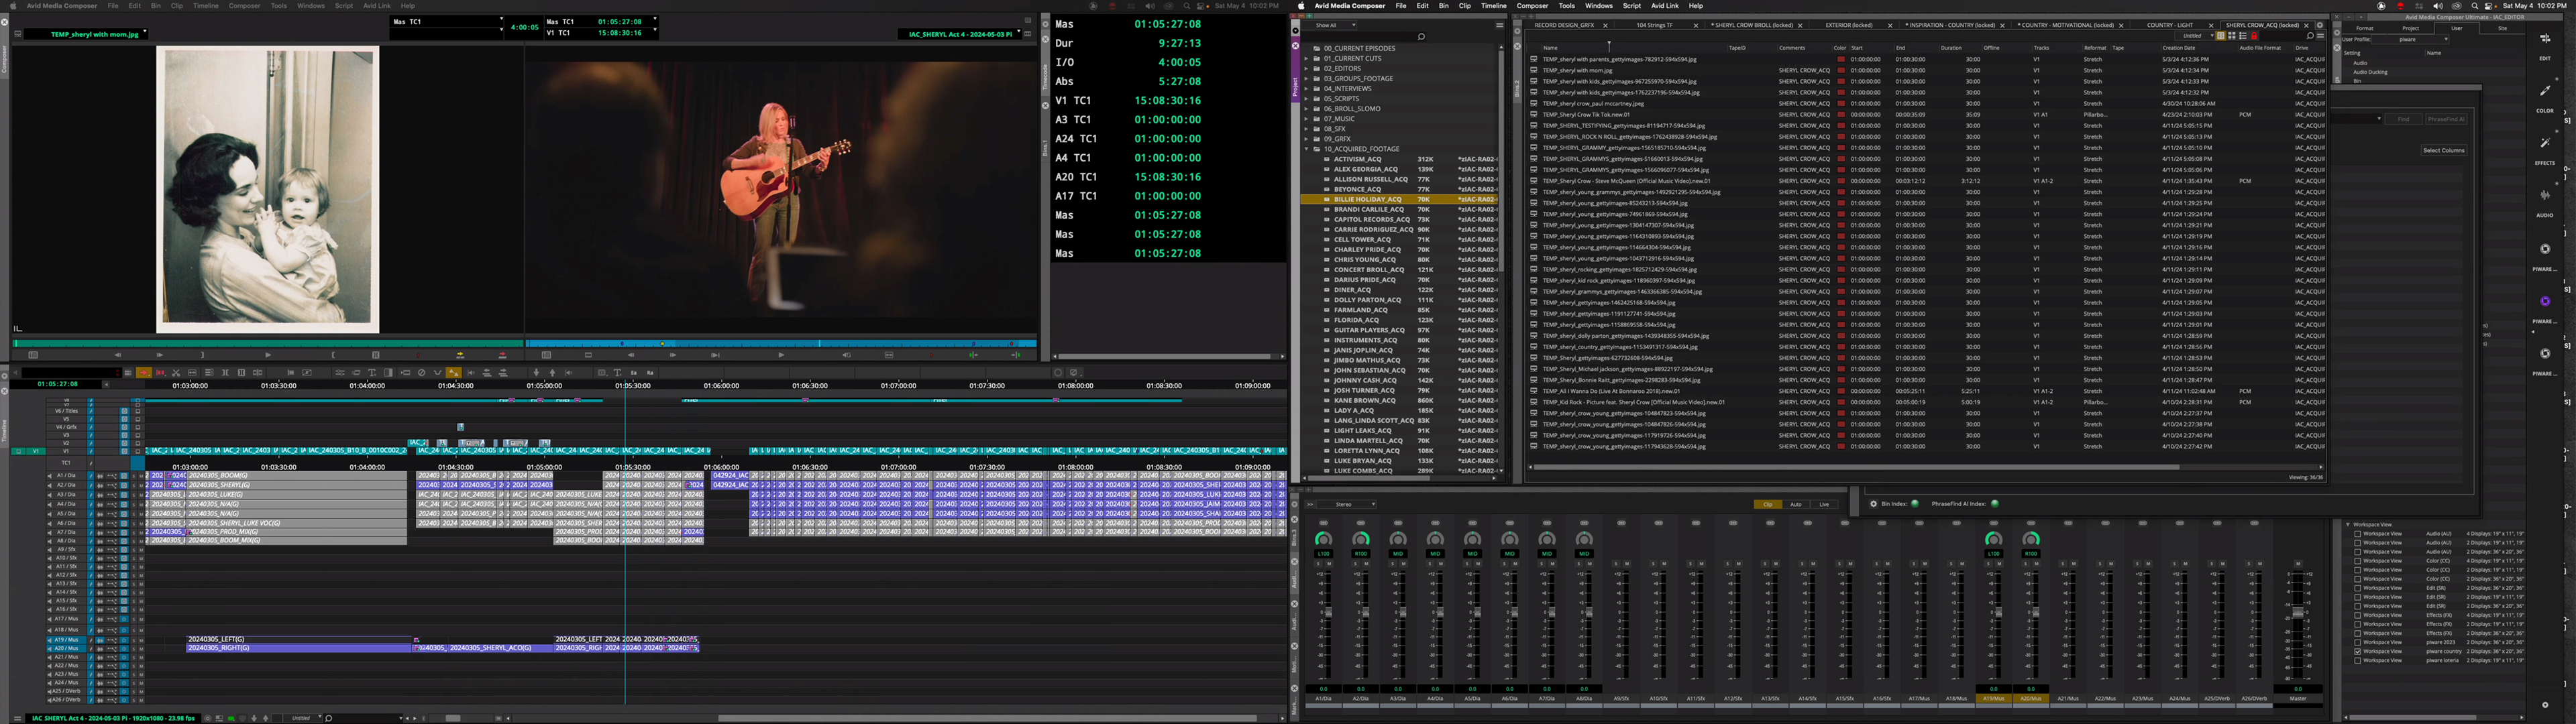
(Some people were asking, so I'm posting this here, but feel free to ignore my bin organization and absolutely do your own thing.) Here’s the way I set up my bins screen..... The project window has its own frame, and then I have 2 frames (1 big frame for most bins tabs, 1 small frame for my cuts bins tabs, which also hides/reveals my Audio Mixer & Audio Suite & Motion Effects & Markers on the left-hand frame tabs (frame tabs are different kind of tabs than the bin tabs, mind you!), and a third frame for the settings (all the way on the right). You have to drag shit around using a combination of the option keys and you have to drag things into different corners / middles of other bins to get them to separate into new frames. I wish I had an elegant way of explaining it, but I kinda just button mash / experiment with dragging tabs (both the ones on the left side of the frame & the ones at the top of a frame). But option dragging tabs is key. Avid is trying to imitate Premiere, which is also odd in the way bins tear off/add to frames. Welp, hope that helps someone. (edited)